Small-home storage works best when every item earns its space and every cleaning task has an obvious home. The goal is not a photogenic wall of matching bottles. It is a safe system you can reset in a few minutes.
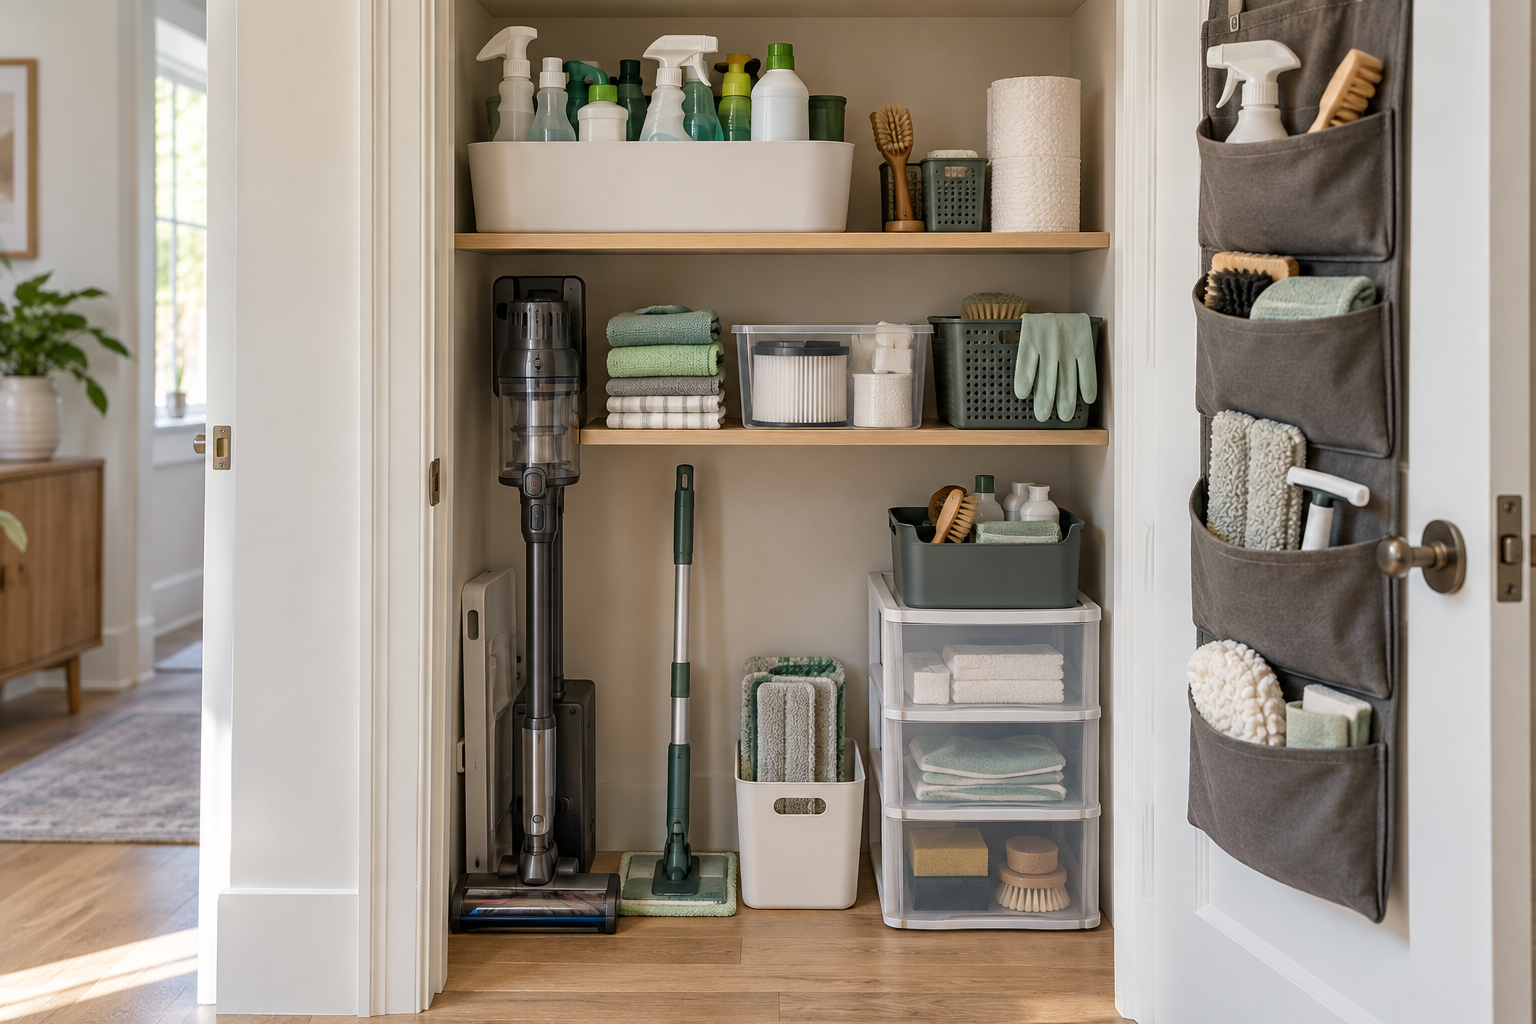
1. Start with a complete inventory
Collect cleaning supplies from the kitchen, bathroom, laundry area, entryway and car. Separate them into five groups: chemical products, washable textiles, handheld tools, refills and powered equipment. Dispose of empty, damaged or unwanted products according to the label and local household hazardous-waste guidance.
Duplicates are only useful when they prevent a real inconvenience. Three half-used glass cleaners stored in different rooms create clutter without adding capability.
2. Choose one primary storage zone
A shallow utility closet, high laundry cabinet or locked hall cupboard can become the main zone. Measure usable width, depth and height before buying organizers. Include door hinges, pipes, outlets and the space needed to remove a vacuum battery or water tank.
If one location cannot hold everything, use a primary zone plus one small room-specific kit. Avoid scattering full product ranges throughout the home.
3. Put chemical safety before convenience
EPA guidance recommends keeping household hazardous products in their original containers with labels intact and never transferring them into food or drink containers. Store cleaners out of reach of children and pets—preferably in a high or locked cabinet—and close child-resistant packaging correctly.
- Keep bottles upright with caps and triggers fully closed
- Use a solid, washable bin to contain small leaks
- Do not store cleaners beside food, medicine or pet supplies
- Do not combine leftover products in one bottle
- Never mix bleach with ammonia, acids or other cleaners
- Follow each label's temperature and ventilation instructions
4. Build four visible zones
High shelf: chemicals
Place sprays, concentrates and disinfectants in one contained bin. Keep labels facing forward so you can identify a bottle without lifting several others.
Middle shelf: frequently used dry tools
Store microfiber cloths, gloves, sponges and brushes in open bins or shallow drawers. Let damp items dry completely before enclosing them.
Lower area: machines and long tools
Give the vacuum, mop and carpet cleaner a fixed footprint. Mount long handles only into suitable wall structure and follow charging-clearance instructions for powered equipment.
Small refill zone
Set one bin or shelf section as the limit for replacement filters, mop pads, bags and unopened refills. When it is full, use what you have before buying more.
5. Use the door carefully
An over-door organizer can hold light, dry items such as gloves, cloths, spare pads and brushes. Avoid loading it with heavy liquid bottles unless the organizer and door are rated for the weight. Make sure pockets do not prevent the door from closing or block a child-safety latch.
6. Create one grab-and-go caddy
A small caddy should contain only the items used together: one approved surface cleaner, cloths, gloves and a small brush. Return it to the locked or high storage zone after use. A caddy is a transport tool, not permanent low-level chemical storage.
7. Store powered cleaners for their next use
Empty dirty-water tanks, rinse removable parts as directed and allow them to dry before reassembly. Wrap cords loosely around the intended hooks, store hoses without sharp bends and keep batteries away from heat or moisture. Follow the manufacturer's charging and storage instructions.
For larger machines, record the assembled footprint and required ventilation before assigning a closet. Our guides to cordless vacuums, portable carpet cleaners and steam mops compare storage trade-offs directly.
8. Label the location, not the bottle
Original product labels contain safety, use and first-aid information. Keep them intact. If you want visual order, label the bin or shelf—“daily cleaning,” “floor care,” “filters”—instead of replacing manufacturer packaging with matching containers.
A compact layout that works
| Location | Store here | Avoid |
|---|---|---|
| High or locked shelf | Cleaning chemicals and concentrates | Food, medicine and unlabeled mixtures |
| Middle shelf | Dry cloths, gloves and brushes | Damp textiles in closed bins |
| Door pockets | Light, dry accessories | Heavy liquids and overloaded hooks |
| Floor zone | Vacuum, mop and larger machines | Leaking bottles or blocked exits |
| Refill bin | Filters, pads and one backup | Open-ended stockpiling |
The ten-minute monthly reset
- Return misplaced supplies to their assigned zone.
- Check bottles for damage, corrosion or leaks.
- Wash the containment bin and dry it completely.
- Launder cloths and pads according to their care instructions.
- Check filters, bags and consumables before buying replacements.
- Remove anything that no longer belongs in the cleaning system.
What not to do
Do not decant cleaners into decorative drink-style bottles, combine chemicals to save space, store damp cloths in sealed containers or place a charging battery next to liquid products. A compact system should reduce risk and effort—not hide important information.